Using Github-Jenkins-Codedeploy as CI-CD ToolThe daily life of a developer is filled with monotonous and repetitive tasks. Fortunately, we live in a pre-artificial intelligence age, which means computers are great at handling boring chores and they hardly ever complain about it! So let's set up some automation to make our daily grind a little less grindy. Testing and deployment are two integral elements of web development. With some automation mixed in, they become solutions commonly called "continuous integration" (CI) and "continuous deployment" (CD). Continuous Integration is a software development practice where continuous changes and updates in code base are integrated and verified by an automated build scripts using various tools. Continuous Deployment is also a software development practice whose role is to automatically deploy the code to the specified server and application folder once the code is been integrated successfully. Now we'll set up a popular continuous integration server called Jenkins and sync it with GitHub so it will run tests every time new code is pushed. After that, We'll setup a solution to automatically push that code to our app/web server using Codedeploy(AWS CD Tool) , eliminating the need for us to deploy manually. Note : I assume that you have baseline knowledge of working with AWS(EC2) and Github. Git Up on GitHub Since we'll be storing our project on GitHub, let's begin there. Login to (or create) your GitHub account and create a new repository. Name it "hello-cloudcover". For simplicity, let's keep the repo Public. Go ahead and check the Initialize this repository with a README option. Click the Create repository button, and our repo will be ready. 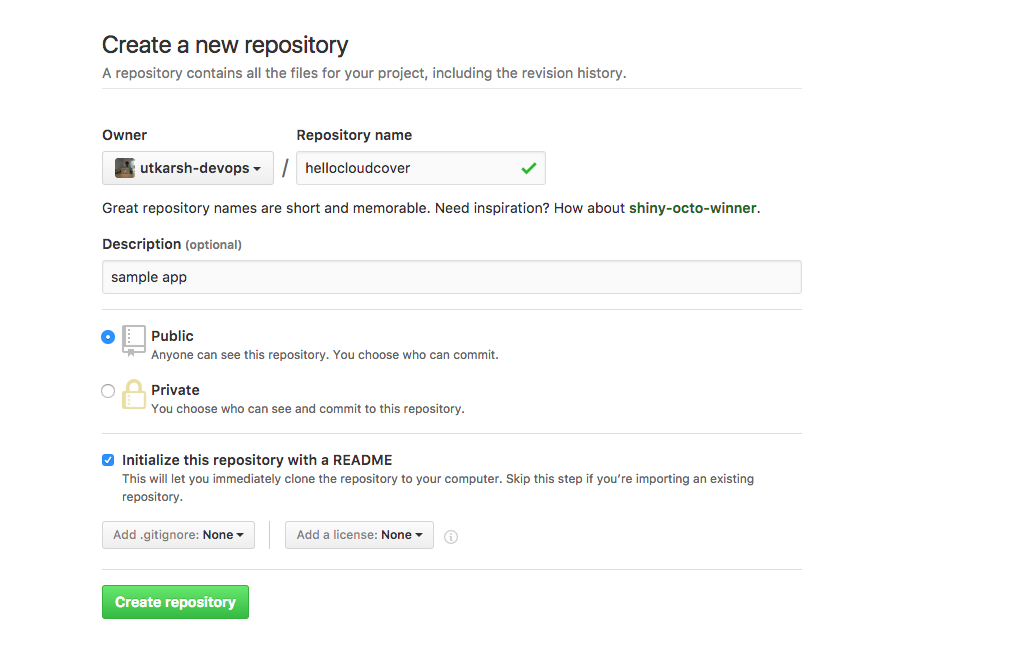 Now commit your code on newly created git repo so that it can be used for CI on Jenkins. Time For jenkins !!! Create an EC2 with Ubuntu OS to setup Jenkins Server. We spun up this instance on EC2. Now we need to install Git: sudo apt-get install git Next is install Jenkins. Installing Jenkins is fairly simple - we'll have apt-get do all of the heavy lifting. The only catch is that we need to add a new apt repository before starting the install: sudo wget -q -O - http://pkg.jenkins-ci.org/debian/jenkins-ci.org.key | sudo apt-key add - Now we can install Jenkins: sudo apt-get install jenkins Once complete, Jenkins will be running and available on port 8080. Navigate your browser to the Instance IP address at port 8080 and you'll see the Jenkins landing page. 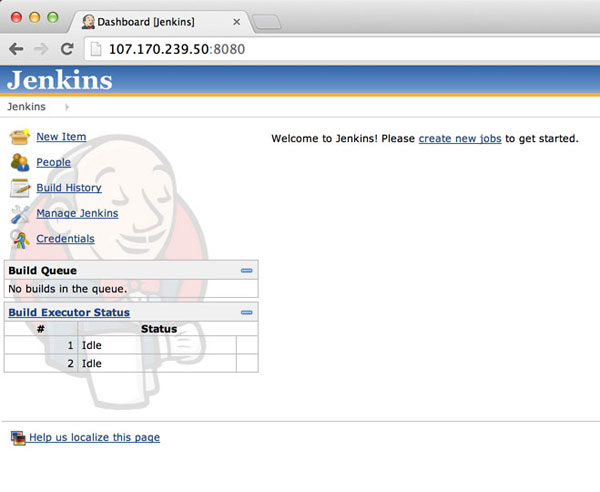 Go to Jenkins Manage Jenkins -> Manage Plugins In the Available tab search and select GitHub Plugin and AWS CodeDeploy plugin After selecting click Download and Install after restart This will download and install both the plugins and restart Jenkins . 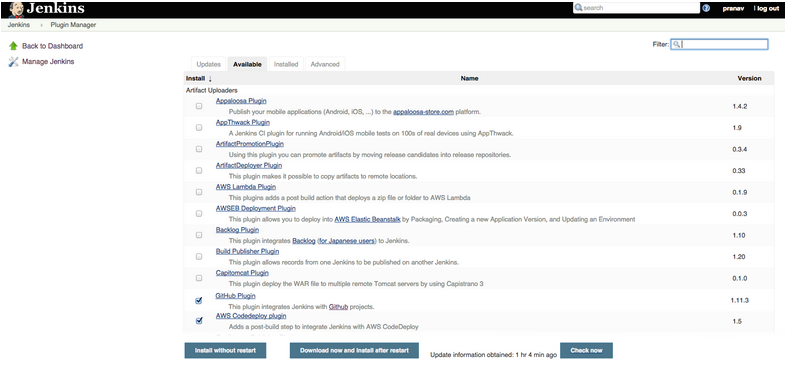 Once Jenkins has restarted, it's time to add our project. Click the New Item button. Use "hello-cloudcover" for the item name, select Build a free-style software project, and click the button labeled OK. 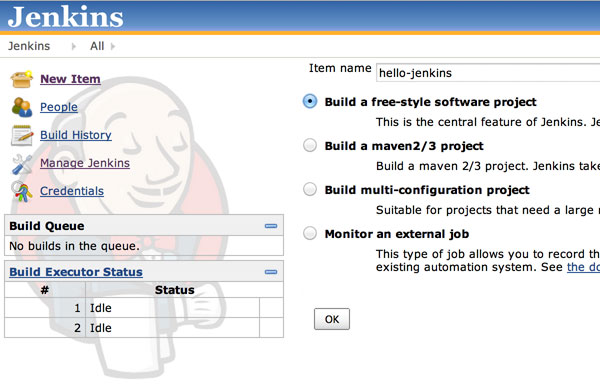 Now lets get our git repo url for our project. You can paste your own repo url and paste it in the GitHub Project box Scroll a little further down and click the box to enable Build when a change is pushed to GitHub. With this option checked, our project will build every time we push to our GitHub repo.What this will do is whenever a new update is pushed to the specified branch Jenkins will automatically get triggered and will pull the latest updates from the git repo and perform build actions. The Build option contains build steps, in my case I have selected Execute Shell. The Command box contains a shell script saved in my jenkins home directory. This script contains commands to run test case for the application. If the test case fail then Jenkins would not go further to deploy or won’t perform any further actions and report as Build Failed. 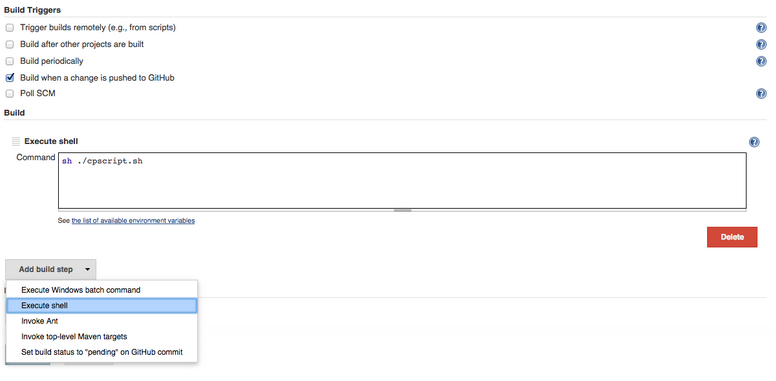 Click Save To finish setting up the integration, head over to the GitHub repo, and click Settings. Click the Webhooks & Services tab, and then the Add service drop-down. Select the Jenkins (GitHub plugin) service. 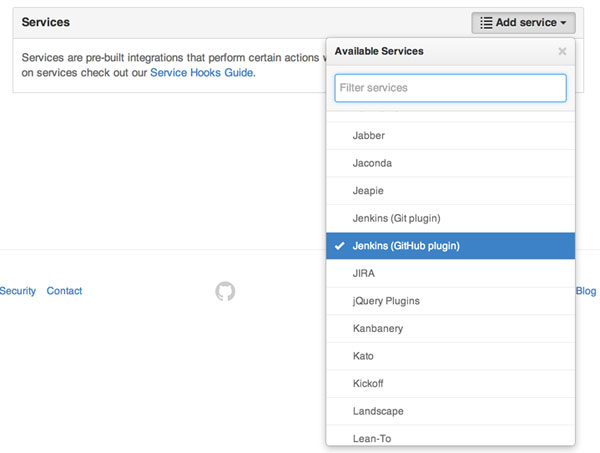 Add the following as the Jenkins hook url: http://Jenkins.Server.IP.Address:8080/github-webhook/ Click Add service. Our project is now ready for its first Continuous integration test! Now push your changes to GitHub and keep your eye on Jenkins : After a second or two, you should see that a new job has been initiated for our hello-cloudcover project in Jenkins - If your Jenkins job runs successful then you are done Continuous Integrating !!!. Lets move towards next step now which is Continuous Deployment ..... Go on Jenkins Job to move forward and under Add Build Step, select Deploy an application to AWS Code Deploy In AWS CodeDeploy Application Name : (Fill in your AWS CodeDeploy application name). 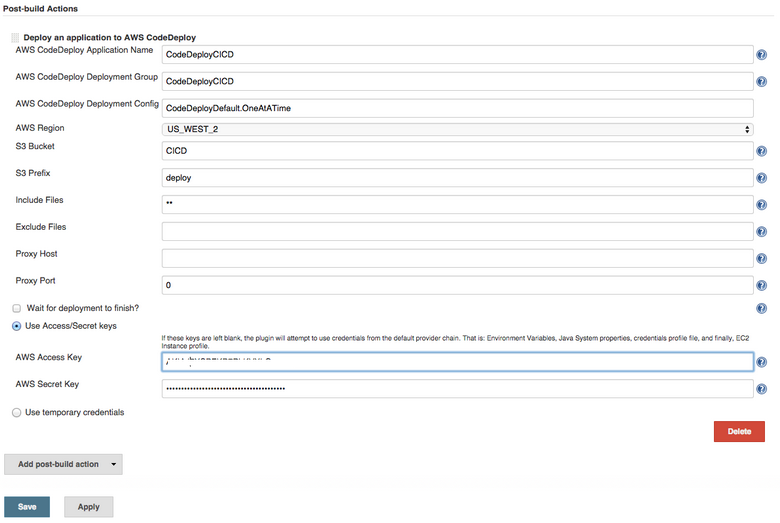 Now its time to Build your project to check CD. So, here on my local machine I commit a code update to my git repo . This will automatically trigger Jenkins and you will see that it has started to build the project automatically. 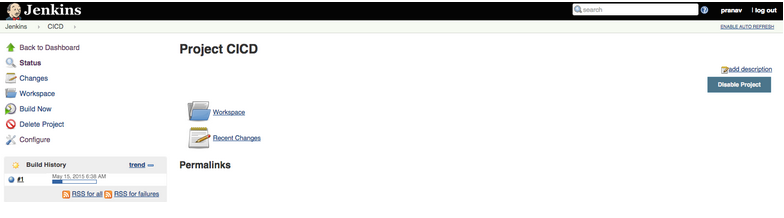 If the build is successful then Jenkins will create a zip file of your updated application and push it to AWS S3 and further trigger AWS CodeDeploy application. 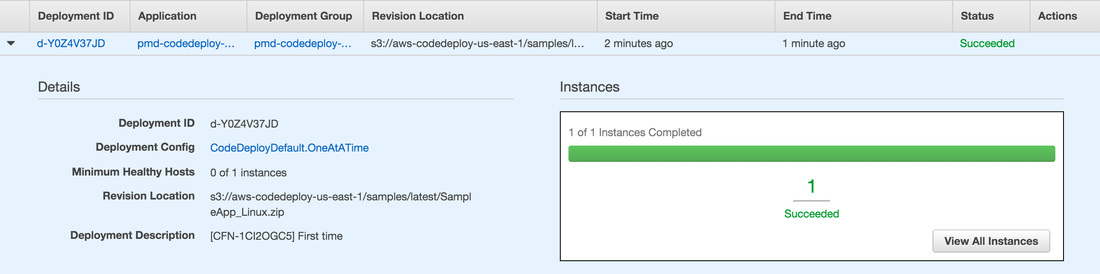 Yoo, ! And Guess what you are done with CI CD Pipeline Successfully !!!!!! In the end, we've successfully set up both continuous integration and continuous deployment, which provides a very nice level of automation in our daily lives. Till the time Computer operates your CI CD, go have fun and make Cappuccino for yourself and taste it like an automation Champ !! Thank you
0 Comments
|
AuthorUtkarsh Sharma Archives
October 2023
Categories
|
